Board part
All 46 pins, the symbol drawing reference, the footprint pad positions and the user guide. The pin file imports into Proteus 9.2 with no warnings.
The TM4C123G board as a part for Labcenter Proteus. It is drawn with the same layout as the real board, so students find the buttons, the LED and every header pin in the same place in Proteus and in the lab.
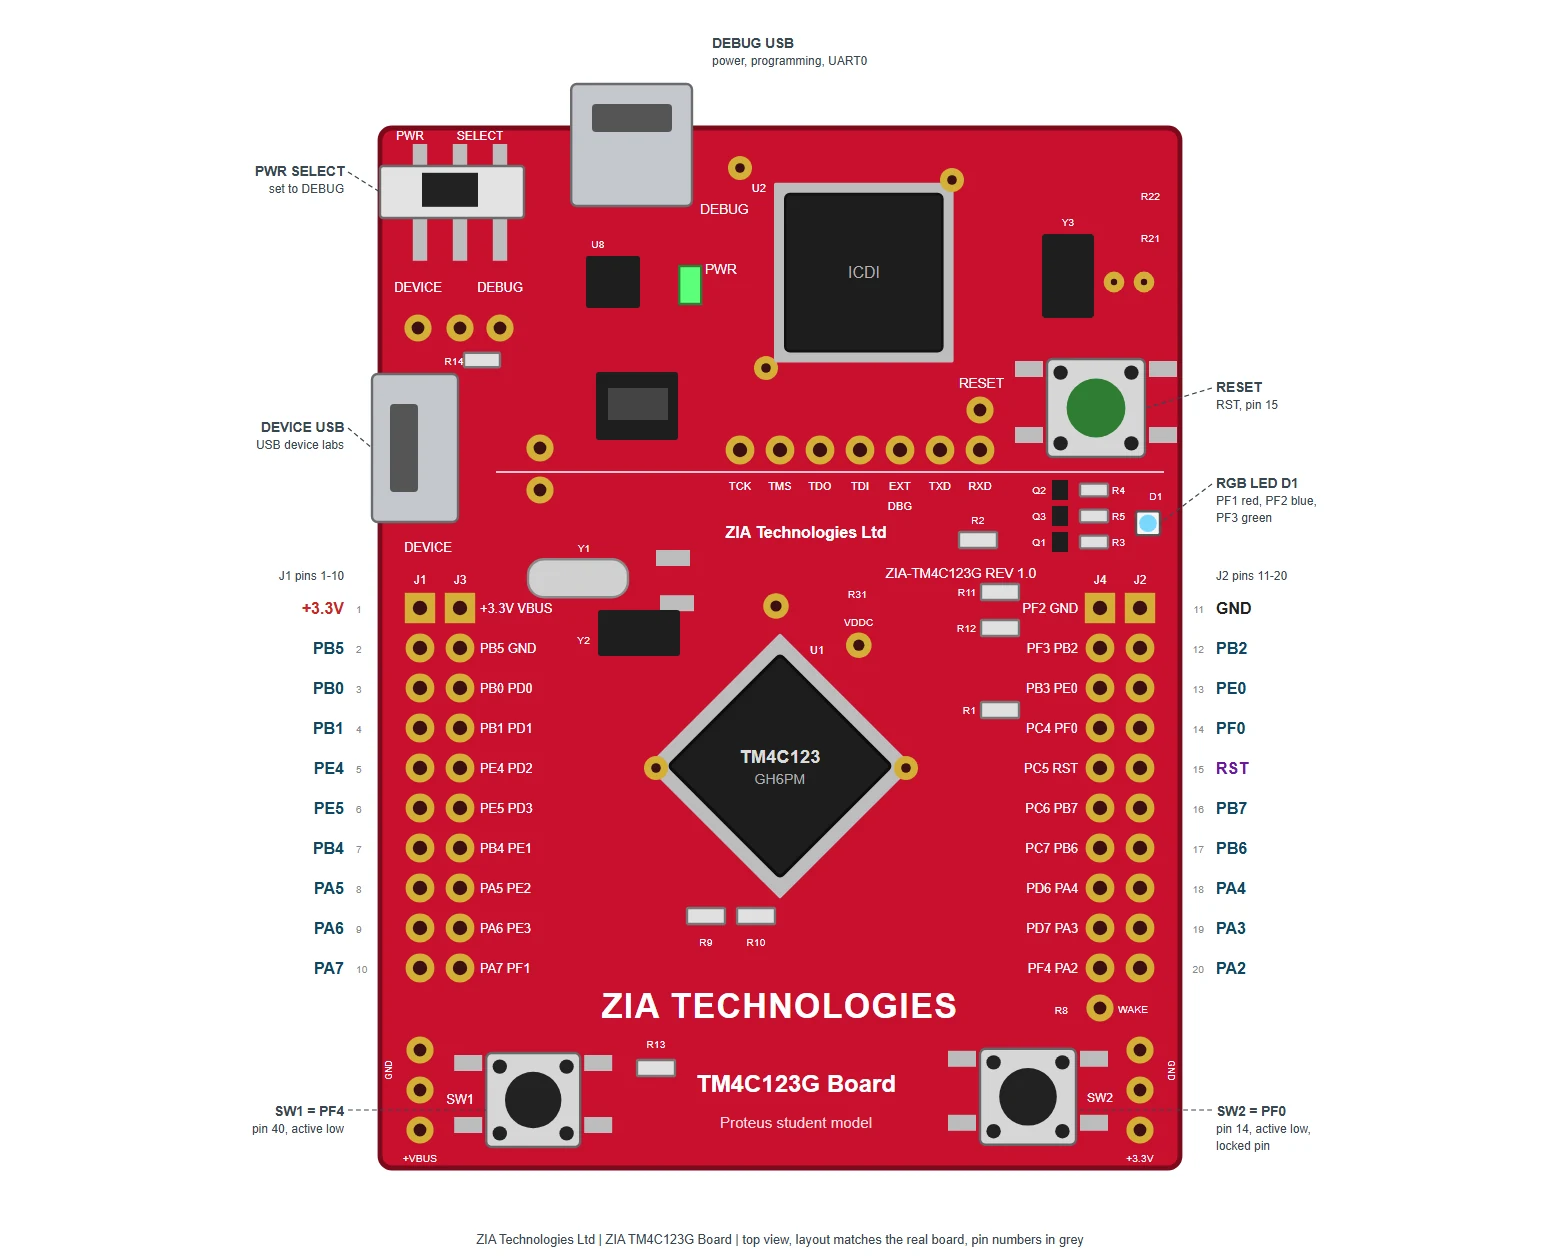
The part
Each position in the drawing was measured from the real board. Header pins J1 to J4 carry the same names and numbers students see in their lab sheets, and the pin numbers are printed in grey beside each label.
Status
We would rather show the real status than a release date we cannot promise.
All 46 pins, the symbol drawing reference, the footprint pad positions and the user guide. The pin file imports into Proteus 9.2 with no warnings.
The model that runs student programs inside a Proteus schematic, with a live RGB LED and clickable SW1, SW2 and RESET. It uses the same simulator core as the ZIA TM4C123G Board Simulator.
Tell us which version your lab runs. We will let you know when the simulation model is ready to try.